目录
---------
历经千辛万苦,终于有了第一版的 硬件管理系统,笔记用于记录开发中遇到的问题
Next-Auth
Next-Auth 用于单点登录的库,创建 pages/api/[...nextauth].ts 文件,内容如下
import NextAuth, { NextAuthOptions } from 'next-auth'
import { NextApiHandler } from "next";
import { PrismaClient } from '@prisma/client'
const prisma = new PrismaClient()
import CredentialsProvider from 'next-auth/providers/credentials'
import { encrypt } from '../../../utils/useCrypt'
import { PrismaAdapter } from '@next-auth/prisma-adapter'

export const authOptions: NextAuthOptions = {
  adapter: PrismaAdapter(prisma),
  providers: [
    CredentialsProvider({
      name: 'Credentials',
      credentials: {
        invitedCode: { label: 'INVITEDCODE', type: 'text', placeholder: '邀请码' },
        name: { label: 'NAME', type: 'text', placeholder: '用户名' },
        email: { label: 'EMAIL', type: 'text', placeholder: '邮箱' },
        password: { label: 'PASSWORD', type: 'password' },
      },
      async authorize(credentials) {
        try {
          if(credentials?.invitedCode !== process.env.INVITEDCODE) throw new Error('邀请码错误')
          if (!credentials || !credentials.email || !credentials.name || !credentials.password.trim()) throw new Error('获取失败')
          const user = await prisma.user.findFirst({
            where: {
              email: credentials.email,
              name: credentials.name,
              password: encrypt(credentials.password),
            },
          })
          if (user == null) {
            const newUser = await prisma.user.create({
              data: {
                email: credentials.email,
                name: credentials.name,
                password: encrypt(credentials.password),
              },
            })
            return newUser
          }
          return user
        } catch (error: any) {
          return null
        }
      },
    }),
  ],
  // debug: true,
  jwt: {
    secret: process.env.JWT_SECRET,
  },
  session: {
    strategy: 'jwt',
  },
  secret: process.env.NEXT_SECRET,
  callbacks: {
    async jwt({ token, user }) {
      if (user) {
        token.id = user.id
      }
      return token
    },
    session: async ({ session, token, user }) => {
      try {
        if (session?.user && token) {
          session.user.id = token.id as string
          const findUser = await prisma.user.findUnique({
            where: {
              id: session.user.id,
            },
          })
          if (!findUser) throw new Error('用户不存在')
          return { ...session, role: findUser.role }
        }
        throw new Error('session 不存在')
      } catch (err) {
        return session
      }
    },
  },
}

const authHandler: NextApiHandler = (req, res) => NextAuth(req, res, authOptions)
export default authHandler
服务端配置
这里配置的代码的都是运行在服务端
适配 Prisma
由于我们的项目采用 prisma 框架,因此需要使用 PrismaAdapter 适配器:
- 首先安装
@next-auth/prisma-adapter:
yarn add @next-auth/prisma-adapter
[...nextauth]中引入适配器:
import { PrismaClient } from '@prisma/client'
import { PrismaAdapter } from '@next-auth/prisma-adapter'
const prisma = new PrismaClient()

export const authOptions: NextAuthOptions = {
	adapter: PrismaAdapter(prisma), // 参数是 PrismaAdapter 的实例对象
  // ...
}
登录规则
我们采用 Credentials 方式登录,该方式较为灵活,本项目采用邀请制的方法
- 配置
authOptions
credentials 是我们登录时需要填写的信息,该信息可以在 authorize 函数中的第一个参数获得
export const authOptions: NextAuthOptions = {
 	providers: [
    CredentialsProvider({
      name: 'Credentials',
      credentials: {
        invitedCode: { label: 'INVITEDCODE', type: 'text', placeholder: '邀请码' },
        name: { label: 'NAME', type: 'text', placeholder: '用户名' },
        email: { label: 'EMAIL', type: 'text', placeholder: '邮箱' },
        password: { label: 'PASSWORD', type: 'password' },
      },
      async authorize(credentials) {
      	// 验证规则
      }
    }),
  ]
  // ...
}
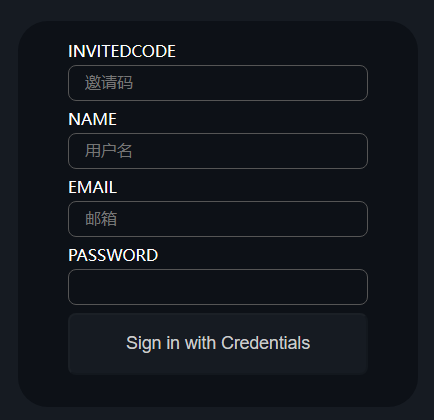
效果图:
- 配置验证规则
authorize函数
各段代码含义已添加注释
async authorize(credentials) {
  try {
    // 1. 首先判断邀请码是否正确,错误直接抛出
    if(credentials?.invitedCode !== process.env.INVITEDCODE) throw new Error('邀请码错误')
    // 2. 判断用户输入的凭据是否为空,为空抛出错误
    if (!credentials || !credentials.email || !credentials.name || !credentials.password.trim()) throw new Error('获取失败')
    // 3. 在数据库寻找与用户输入凭据相同的数据
    const user = await prisma.user.findFirst({
      where: {
        email: credentials.email,
        name: credentials.name,
        password: encrypt(credentials.password),
      },
    })
    // 3.1 如果数据库中没有这个用户,那么我们直接创建新的用户
    if (user == null) {
      const newUser = await prisma.user.create({
        data: {
          email: credentials.email,
          name: credentials.name,
          password: encrypt(credentials.password),
        },
      })
      return newUser
    }
    // 3.2 数据库中有这个用户,直接返回
    return user
  } catch (error: any) {
    // 4. try 代码块抛出的错误,这里直接返回 null
    return null
  }
},
验证规则
登录验证采用 jwt + session 方式
- 配置
jwt和session选项
export const authOptions: NextAuthOptions = {
  jwt: {
    // 为 jwt 添加 secretKey
    secret: process.env.JWT_SECRET,
  },
  session: {
    // 指定 session 的策略为 jwt
    strategy: 'jwt',
  },
  // 这里一定要有一个 secret !!!!,不然部署到 vercel 后会失效
  secret: process.env.NEXT_SECRET,
  callbacks: {
    // 回调函数
  },
}
- 书写
callback
callbacks: {
  // 配置 jwt
  async jwt({ token, user }) {
    if(user) {
      token.id = user.id
    }
    return token
  },
  async session({ session, token, user }) {
    try {
      // 1. 如果 session 不为空,且存在 user 属性,并且 token 也不为空
      if(session?.user && token) {
        // 1.1 配置 session 中的存储内容,主要通过 token 的 id
        session.user.id = token.id as string
        // 1.2 通过 id 找到该用户,这么做的目的是因为本项目有一个用户权限控制的页面,需要获取用户的 role
        const findUser = await prisma.user.findUnique({
          where: {
            id: session.user.id,
          },
        })
        // 1.3 用户不存在直接返回
        if (!findUser) throw new Error('用户不存在')
        return { ...session, role: findUser.role }
      }
    } catch(err) {
      // 2. 报错直接返回 session,注意这里不能返回 null
      return session
    }
    // 3. 如果没有我的上述需求,你可以直接这样书写:
    /*
    		if(session?.user && token) {
    			session.user.id = token.id as string
    		}
    		return session
    */
  }
}
客户端使用
- 首先找到
_app.tsx文件夹,我们需要使用<SessionProvider>组件包裹其原来的组件:
import '../styles/globals.css'
import type { AppProps } from 'next/app'
import { SessionProvider } from 'next-auth/react'
import React from 'react'

export default function App({ Component, pageProps: { session, ...pageProps } }: AppProps) {
  return (
    <SessionProvider session={session}>
    	<Component {...pageProps} />
    </SessionProvider>
  )
}
- 登录退出
登录退出功能只需要简单调用 signIn、signOut 函数即可
import { signOut, signIn } from 'next-auth/react'
export default function Page() {
	reutrn (
  	<>
    	<button onClick={() => signIn()}>登录</button>
    <button onClick={() => signOut()}>退出</button>
    </>
  )
}
- 在组件中使用
只需要调用 useSession 函数即可
import { useSession } from 'next-auth/react'

export default function Page() {
	const { data: session } = useSession()
  console.log(session)
  return <div>Page组件</div>
}
打印信息:

Tip:
useSession只能在<SessionProvider>包裹下的子组件中使用
一些类型定义
如果配置 callback 出现类型错误,往往是自己向 session 或者 token 中新增了一些数据,我们可以在 types/next-auth.d.ts (没有就新建一个)修改类型:
// 附上我的,不必一样
import NextAuth, { DefaultSession } from 'next-auth'

declare module 'next-auth' {
  interface Session {
    user: {
      id: string
    } & DefaultSession['user']
    role: number
  }
}
Prisma
使用 mongodb 数据库
由于之前一直使用的是 sqlite 本地文件存储(好像挺不错的,但是感觉怪怪的),这次使用 mongodb 也遇到了一些麻烦
- 首先配置
schema.prisma
datasource db {
  provider = "mongodb"
  url      = env("DATABASE_URL")
}
注意:定义的
DATABASE_URL环境变量必须存在于.env中,.env.local等其他的环境变量文件不可以
- 连接 mongodb 数据库
在终端运行:
npx prisma db push
注意:需要保证远端的 mongodb 是具有副本集的,否则连接不上
Prisma 部署到 vercel
这里真的踩了大坑了,导致浪费了两天的时间(狠狠当了一把运维小子),起初部署到 vercel 上时,报错是 CLIENT_FETCH_ERROR,查找了一圈也没解决,后来才知道,prisma 要部署到 serverless 服务器上,需要额外配置,即修改 package.json 文件:
{
  "script": {
    "vercel-build": "prisma generate && next build"
  }
}
不同数据库的配置信息不同,这里用的是 mongodb
NextJS
这里踩的坑倒是不多
getStaticProps()函数中不能调用自己写的/pages/api目录的后端接口